Friday, March 30, 2012

How to Dye Easter Eggs without a Easter Egg Dye Kit

Here's an easy way to dye Easter eggs without a dye kit. 

Place hard-boiled eggs in a bowl and add a few capfuls of white vinegar. Roll the eggs around so they are completely covered by the vinegar.

Put the eggs in a colander, add a few drops of food coloring. Roll the eggs around gently. Wait a minute to let the food coloring set.


Add more food coloring. Roll eggs around and wait another minute.


You can add another color if you'd like. Let the eggs fully dry, preferably overnight.


Or, you can rinse the eggs after you finishing coloring them for a brighter look. These eggs will not require a night to dry.


Easter egg dye kits will only run you about $5 but this is perfect in case you're too busy to run to the store. There are also fun to make any time of year. 

Enjoy!

Tuesday, March 27, 2012

Candy Cars!

Here's a cute way to transform some everyday snack items into an adorable candy car.

Unwrap a fun sized candy bar.   
Cut out a silver that extends half way down the candy bar.

Use frosting or whipped cream to "glue" m&m wheels to the "car". Stick an animal shaped cookie/cracker into the slit.
One very satisfied customer! (I don't think a normal candy bar would garner that smile!!)
Enjoy!

Wednesday, March 14, 2012

¡Ayúdeme (Help Me!)

"I want to watch Go, Diego, Go. IwanttowatchGoDiegoGo. IwannawatchDiego!!"

That was my impression of Archer whose current current obsession is, you guessed it, "Go, Diego, Go".  Those of you not familiar with the show, Diego, an 8 year old boy, goes around helping animals in trouble. The animals call out to him by yelling, "ayudeme!", which translates to, "help me!" In order to have more Go, Diego, Go time without turning on the television, I made up a game named, "Ayudeme".

The person playing Diego waits while the person playing the animal get's into "trouble". This can mean getting "stuck" underneath cushions or getting a foot "caught" in a blanket. Once the "animal" is in trouble, s/he calls out, "ayudeme!" and Diego comes running to the rescue.

If your child prefers a different show, try to adapt one of its themes into a game your child can act out. Archer loves playing the role of both his favorite tv character and the animals who need help. I love the fact that the tv is OFF.

Enjoy!

Monday, March 12, 2012

Frozen Yogurt Chips

Here's a fun twist on an item you probably already have in your fridge. Archer loves it when I take flavored, albeit mundane, yogurt and turn them into frozen chips. It's amazingly simple to make, and ready in under 15 minutes.

Line a baking sheet with foil.
Line a mug with a sandwich baggie. Spoon in yogurt.
Take out the baggie, snip a corner, (you now have a makeshift piping bag). Dot yogurt on the baking sheet. Obviously, the dots don't have to all be the same size.  :o)  Pop the sheet in the freezer. Depending on the size of the dots, keep them in between 5-10 min.

Once frozen, enjoy immediately or transfer to a freezer bag.

Friday, March 9, 2012

Chalkboard Paint

Here's an easy way to take ordinary items and change them into an afternoon of fun. (Archer first loved painting his little flower pot, and then loved coloring on it with his chalk.) You'll need:

Non-Sanded Grout (found at your local hardware store)
Acrylic Paint
Paintbrush
Empty Container
Item to Paint

I washed and dried an empty glass bottle and added 1 1/2 tsp non-sanded grout:


Next comes about 1/4 cup of paint:


And mix, (I used a stick since I was using a foam brush to paint with):


Based on the item you're painting, you'll need anywhere between 1-3 coats of paint. Once you've finished with the painting and the paint has dried completely, go over the item with a piece of chalk to prep the surface, then wipe away:


Then, enjoy!


Wednesday, March 7, 2012

Buttercream Birthday Frosting

Okay, I think I found the perfect frosting for Alexander's birthday cupcakes.

Buttercream Frosting

Ingredients:
  • 1 cup unsalted butter, softened (do not microwave - let it sit on the counter for a couple hours)
  • 3-4 cups confectioners sugar, sifted
  • 1/4 teaspoon salt
  • up to 4 tablespoons milk or heavy cream
  • your favorite extract
Directions: 

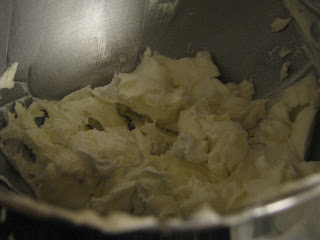
Beat butter for a few minutes with a mixer with the paddle attachment on medium speed, then switch to high. 

After, you've beaten the butter, add 3 cups of powdered sugar and turn your mixer on the lowest speed. 
Once the sugar has been incorporated with the butter, increase mixer speed to medium and the salt, and 2 tablespoons of milk/cream and beat for a few minutes. If you like your frosting more stiff , add remaining sugar. If you like your frosting thinner, add remaining milk/cream 1 tablespoon at a time. If you are only making one flavor of frosting, add 1 tbsp of the extract at this time as well. If you are going to make multiple flavors, hold off on adding the extract at this time. 

Beat for a few minutes until you reach your desired consistency.
I wanted to make 2 flavors of frosting from this batch, so I put half the frosting on a plate, and left the rest in the mixing bowl. I added 3/4 tsp of orange extract to the first half and 3/4 tsp of vanilla extract in the 2nd half. I also added a few drops of orange food coloring to the first half so I would be able to differentiate visually between the 2 flavors.


One very satisfied customer!!
Enjoy!

Monday, March 5, 2012

Birthday Cupcakes

Alexander recently turned one, but due to scheduling conflicts, we won't be having his party for another few weeks.  I have been in the midst of finding the perfect cupcake recipe for the party, and since the theme of the party is "color", I've been looking at vanilla cupcakes. (This way I can add food coloring to the batter to make colorful treats.)

I found this recipe on recipegirl.com:

Ingredients:

1 (18.25 ounce) box white cake mix (I used Duncan Hines French Vanilla)
1 cup all-purpose flour
1 cup granulated white sugar
3/4 teaspoon salt
1 1/3 cups water
2 Tablespoons vegetable or canola oil
1 teaspoon vanilla extract
1 cup sour cream
4 large egg whites

Directions:

1. Preheat oven to 325°F. Place cupcake liners in cupcake pans (you'll need approx. 36).
2. In a large bowl, whisk together cake mix, flour, sugar and salt. Add remaining ingredients and beat with hand mixer for 2 minutes, or until well blended.
3. Use ice cream scoop to fill prepared cupcake tins- fill about 3/4 full. Bake about 18 minutes, or until toothpick inserted in center comes out clean.

To make these cupcakes into colorful cupcakes:

Divide your batter and place into separate bowls. Add enough food coloring to reach desired color. I used Ateco food coloring.
Line your cupcake tin and fill 3/4 full. You can either fill the cupcake with 1 color or used multiple colors.
These cupcakes are perfect for any occasion, just change the food coloring to match. (Easter is right around the corner, hint hint!)
 I am currently experimenting with frosting, so check back soon to read the verdict!